WeArePlanet Salesforce Commerce Cloud (SFCC)
Documentation
1Installation
1.1Download
Please download the latest zip or tar.gz file from the releases in our releases page.
1.2Preparation
Unzip the file in your local computer. You need to rename a couple of directories inside it:
-
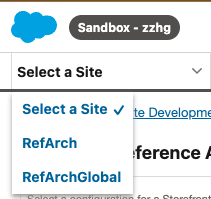
metadata/sites/yourSiteId: Rename the yourSiteId with your site id. You can find this on the top left of the administration page of your SFCC instance.

-
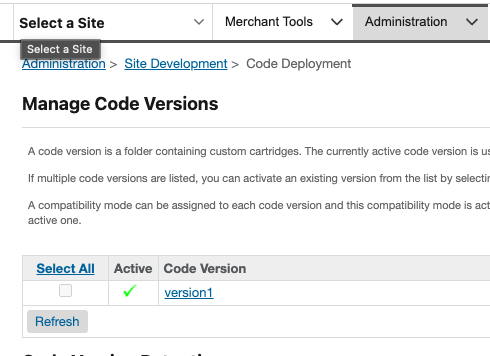
cartridges: rename the cartridges folder with the name of the code version you are using for your site. You can find the code version in Administration > Site Development > Code Deployment
Then you need to zip the files again for uploading it to SFCC.
-
zip the metadata folder only:
zip -r metadata.zip metadata
-
zip the cartridges folder:
zip -r code_version.zip CODE-VERSION/
1.3Uploading the cartridges and the metadata
You need to upload the metadata in Administration > Site Development > Site Import & Export Use the Upload Archive functionality for uploading the metadata.zip file you generated in the previous step.
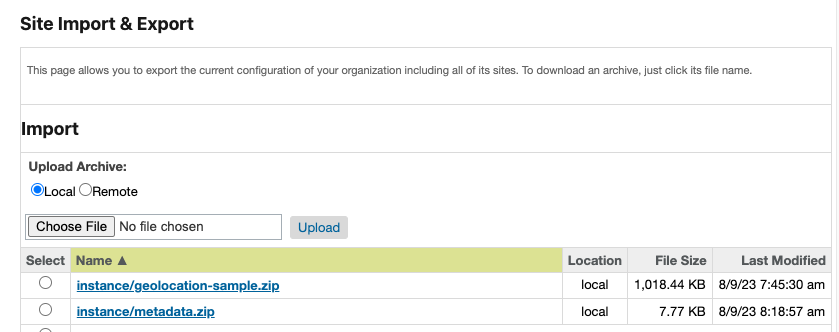
Select your uploaded file from the list and click in the Import button.
You need to upload the cartridges using the sfcc-ci tool. Please refer to its documentation in order to configure it properly, especially about authentication.
Then, run this command for upload the cartridges:
sfcc-ci code:deploy code_version.zip
2Configuration
2.1Enable the cartridges
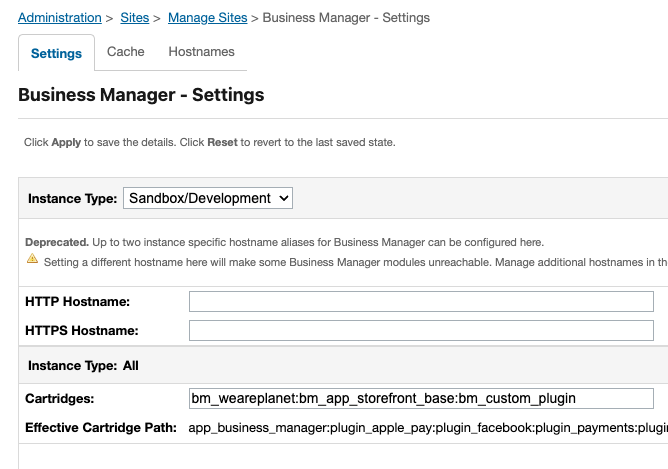
Go to Administration > Sites > Manage Sites.
For each of the sites you want to enable the cartridge, open its Settings and, in the Cartridge field, input (without quotes) "int_weareplanet:".
Save the configuration by clicking on the Apply button.
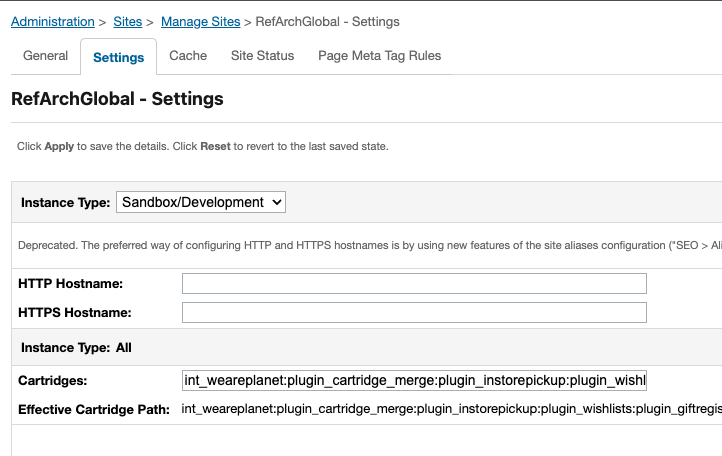
Now click on Business Manager Site, and go to its settings.
Again, in the Cartridges field input (without quotes) "bm_weareplanet:".
Save the configuration by clicking on the Apply button.
2.2Add permissions to the Administrator role
Go to Administration > Organization > Roles & Permissions
Click on the Administrator role.
Click on the Business Manager Modules tab.
Under the Site Preferences section, localize the WeArePlanet option.
Check the checkbox for the Write columnd of the WeArePlanet row.
At the bottom of the page, click on the Update button.
2.3Configure the WeArePlanet settings
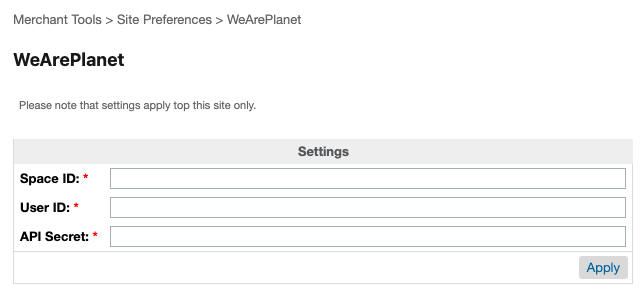
Go to Merchant Tools > Site Preferences > WeArePlanet.
Input the settings provided given to you by WeArePlanet for the Space ID, User ID and API Secret.
Click on Apply button.
2.4Set up the payment methods
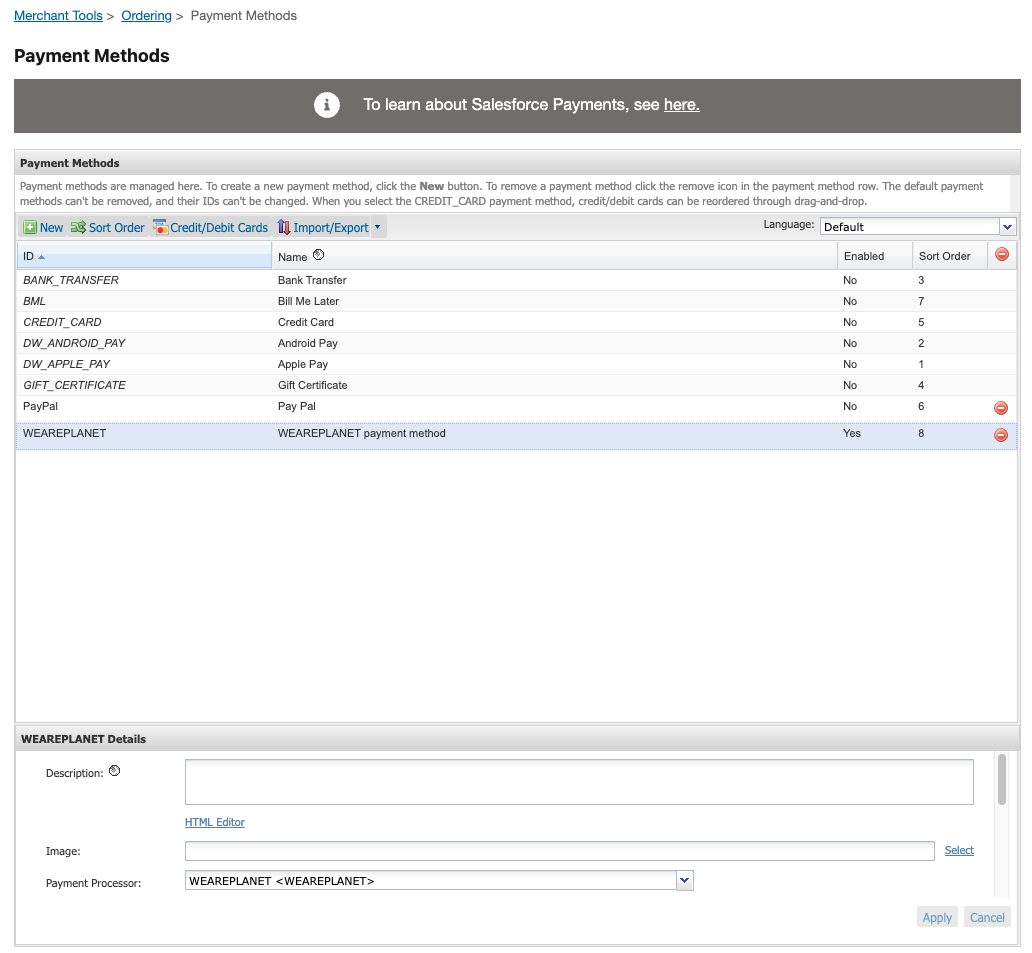
So far, in order to use the payment methods provided by WeArePlanet you need to disable other payment methods available in your SFCC instance.
Go to Merchant Tools > Ordering > Payment Methods.
For each of the payment methods available, except the entry for WeArePlanet, disable them using the panel.
3Order and Payment Statuses
-
Transaction successful: the order status in SFCC will be marked as Open and the payment status will be marked as Paid.
-
Transaction authorized: the order status in SFCC will be marked as Open and the payment status will be marked as Not Paid.
-
Transaction completed: After the transaction has been authorized, the merchant can complete the transaction. Then the order status will be marked as Open and the payment status will be marked as Paid.
-
Transaction failed: the order status in SFCC will be marked as Canceled, and the payment status will be marked as Not Paid.
-
Transaction refunded: After the transaction has been completed or successful, the merchant can refund the transaction. Then the order status will be marked as Canceled and the payment status will be marked as Not Paid.